

GoldenEar Setup Tips
The GoldenEar speakers are capable of simply breathtaking performance. How do you make sure your setup is giving you everything the speakers can provide? Simple, start by reviewing these tips (by model, below) from the man himself, and enjoy the music!”In awe … a revelation … so good it’s almost scary”– Al Griffin, Sound & Vision Magazine
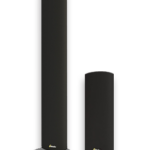
TRITONS
- Assembly: The Triton Two and Three come without the base installed. When you install the base, the screws go through the cloth. As the manual indicates, this requires a firm push while turning the screwdriver.
- Placement: I like the Tritons (all of them) spaced quite far apart if possible, at least as far apart as you are from each (equilateral triangle) or even further. This is not absolutely necessary, but they will sound their best. I find that any good speaker, not just the Tritons, if they have good center fill (with great imaging due to excellent horizontal dispersion), sound best like this. I also like them toed in right at the listener.
- Triton Reference, One, One.R, Two, Two+, Three and Three+:
- Setting the Bass Level Control: The bass section is quite powerful so it’s important to get the level control on the back set appropriately to taste and your room setup. You should start around 12 o’clock on the Triton Reference, One, One.R, Two+ and Three+, 9 to 10 o’clock on the Triton Two and Three. Your setting will also depend on the room and the speakers position in the room relative to boundaries. The speakers clearly change during break-in and you might find yourself re-adjusting the bass level after break-in.
- In a 2-Channel Stereo-only Setup: Connect each speaker with speaker-wire (and power cord) only. Precision circuitry in the Tritons’ electronics takes this speaker wire signal and feeds it to the built-in powered subwoofer. Make sure that your electronics are set for full range playback (no high pass crossover engaged).
- In a Multi-channel (Home Theater and Music) Setup: We have found we get better results when we run LFE cables to the Tritons (LFE is the “.1” part of the 5.1, etc., format and contains the movies’ bass effects). When you run separate LFE cables (use a “Y” splitter if your receiver only has one LFE output) you can then control the LFE output separately from the receiver/processor and raise the level, if desired, rather than have the fixed level when you hook up with just speaker wires. Bass management settings of Left and Right Main = LARGE (absolutely not Small), Sub = Yes, with separate LFE cables run to each Triton, delivers the best performance (more extended and/or higher levels of LFE bass information) with most receivers/processors. Set the sub level on the back of the Tritons with 2-channel music material, and then set the LFE level on your receiver/processor to taste. (You CAN also hook them up with only speaker wire and set the processor for Large Left and Right and Sub = No. This will still yield good results, but may not be as good as using the setup with separate LFE input in addition).
- Using Additional Separate Subwoofer(s): Although all these Tritons have built-in powered subwoofers for superb performance without the addition of a separate subwoofer, bass is sort of like horsepower, and for some listeners, the more the merrier. So you can certainly add an additional subwoofer or two if you like. Normally, you would hook only the outboard sub(s) to the LFE channel of your receiver/processor, still setting as Left and Right Main = LARGE and Sub = YES, thus directing all LFE bass only to the outboard sub(s). Another interesting option is to run the receiver’s/processor’s LFE-out into both the Tritons as well as your additional subwoofer(s), splitting the LFE-out(s) as necessary to achieve three (or more). This will give you, in effect, 3 (or more) LFE subwoofers, which can be quite impactful, as well as giving you smoother LFE coverage throughout your room. To get the LFE level balanced properly between your additional subwoofer and the Tritons, the key is to take full advantage of your additional subwoofer’s capabilities while keeping the LFE level being sent to the Tritons appropriate. Normally, you would have the additional subwoofer(s) playing louder than the Tritons on an LFE signal, using the additional sub’s level control(s) to achieve this.
- Using an Additional Subwoofer With the Smaller Triton Three/Three+: If adding outboard subwoofer(s) to the Triton Three/Three+, to achieve an overall higher playing ceiling and greater dynamic range, you may wish to set them as Small with a crossover set at perhaps 40Hz (for Music) to 80Hz (for Movies).
- Using Triton Towers for Front Mains and Rear Surrounds: Using the Tritons as front main speakers and as rear surrounds, and running a 4-way LFE split into the LFE input on all four Tritons, in effect, gives you four LFE subwoofers in your room. The result is very dramatic and effective at reproducing very balanced in-room bass response. Run two LFE inputs into the front left and right main Triton speakers (again, configure them Left and Right = Large, Sub = Yes), then the other 2 LFE into the rear (surround) left and right Triton speakers and set Surrounds = Large. The trick here is getting a balanced LFE level, since there is only one level control in the processor. I would suggest getting it correct for the front speakers (maybe a little low, to take into account that you are adding LFE channels in the rear), set the sub level control on the two rear Tritons to taste. Note that if the two rear Tritons are smaller than the fronts, the sub level of the rear Tritons should be lower than that of the fronts. We have used this set-up at trade shows and it will flap your pant legs.
- Typically you would not want to use receiver/processor settings like Double Bass, Super Bass, Bass Plus etc., that send the same bass information to the Left and Right main speakers AND LFE since in most cases this sounds boomy, however, some bass fanatics may like it. With all models we also suggest not using, and/or turning off, Audyssey Dynamic EQ, Audyssey Dynamic Volume or Dolby Volume, if present. (Note: Once any Audyssey is engaged, the Dynamic EQ and Dynamic Volume are still engaged unless you specifically turn them off, which we strongly recommend.)
- If you use Triton Fives or Sevens as front speakers, you should run them as Large if you do not have a separate sub (Large Left and Right and Sub No), or as Small (Small Left and Right and Sub Yes) with a 40-80 Hz crossover (depending on room size and listening levels) if you have a separate sub.
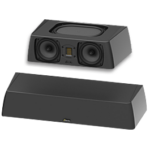
CENTERS

- SuperSat 50C or 60C should be set to Small and 100Hz or 120Hz. crossover. Best used with powered Triton Three and Triton Two or matching L/R SuperSat. Also, excellent as a center channel right under or above a wall mounted TV, with Invisa SPS, MPX, 525 or 650 on the wall spaced far apart for Left/Right. You can also use a larger center matched with smaller Left and Right (for instance a 60C with 50s, or a 50C with 3s). An interesting thing to note, in the TritonCinema Home Theaters the bass info (below the crossover) from the center goes to the left and right Tritons, where it goes into the subs. This gives you a virtual or phantom center channel subwoofer right in the center, where the Center Channel is, giving the sonic impression of a full range center speaker in the system.
- Which to choose? If you have room for a SuperCenter, I suggest using these.
- With the SuperCenters, I suggest 80 Hz or even 60 Hz. They’re a perfect match with Aons and Triton Fives/Sevens, but also a good SuperSat “C” alternative, if you have the space, with the powered Triton towers too. The SuperCenter Reference is the perfect performance match for Triton Reference or Triton One.R based home theaters.
- The SuperSat 3C would also be Small, crossover at 120 Hz (100 Hz or 150 Hz if you don’t have that option), for use in SuperCinema 3 systems.
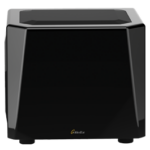
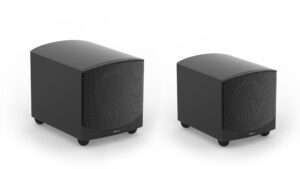
FORCEFIELD, SUPERSUBS AND SUB/SAT SYSTEMS
- The level control on the subs is very sensitive, so normally you will only want it at 8 or 9 o’clock, so start low.
- The subs require a surface below the sub to take advantage of the slot loading and coupling of the bottom radiator. This would normally be the floor and absolutely OK with carpeting. They can go into cabinets or built-in enclosures, as long as the front is more or less open, though it can be covered in grille cloth. And it’s best if the sub sits on the floor, not the floor of the cabinet.
- Locate the L/R Sats as far apart as possible (just like the Tritons) if you can. Set to Small with 100 – 120 Hz crossover.
- When using the sub’s LFE-in, the sub’s crossover low pass control is out of circuit (this input must be used with your system’s bass management sub-out, or a with a low-pass output).
- The SuperSats and a ForceField sub also make a very nice 2 channel stereo system, using the sub’s built-in speaker level crossover, for L/R speaker wire into the Sub and then out to Sats. The crossover control is now functional for best blending with the Sats. At under a $1000 US retail, a pair of SuperSat 3s and a ForceField 3 makes a truly outstanding 2 channel system (and is what I got for my daughter Wendi, which she loves).
SUPERCINEMA 3D ARRAYS
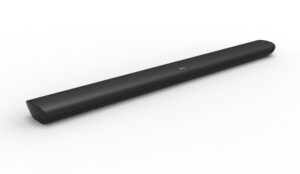
- L/R and Center should be set to Small, Crossover set at 100 – 120 Hz.
- Rear surrounds are optional. (When we designed the 3D Array, we thought people would use them with rear surrounds. Although many are used with rear surrounds, I think that the majority are used without. When you use them without rear surrounds, the Surrounds would be set to No, and the surround information is then sent to the front left and right channels where the special interaural crosstalk circuitry does a good job of giving you surround performance and “feel”.)
- Remember, even though the 3D Array looks like three SuperSats in a long cabinet, it is really much more as the outer drivers are interaural crosstalk cancellation drivers. This technology makes the 3D Arrays the better choice whenever adequate distance between the L/R can not be achieved.
- Setting levels: The 3D Array technology is notorious for confusing auto-setup and even SPL meters. As per the manual, set distances manually and set levels equal across the front, then surrounds/rears/subs to match.
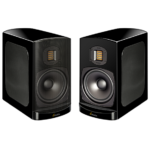
AON BOOKSHELF MODELS
![]()
- Normally the Aon 3s would go on stands and the Aon 2s on shelves, but of course either can go in either mounting. If you use stands, we suggest 30″ stands.
- They both come with keyhole mounting plates that you can install for wall mounting.
- Once again, locate the L/R as far apart as possible and toe them in, if possible, for best results.
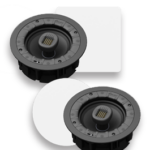
INVISA IN-WALL/IN-CEILING MODELS
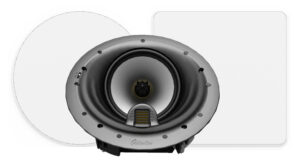
- All models have HF level controls to best match the acoustics of the install environment. I suggest starting in the “+” position.
- The Invisa 525, 650, 652 and HTR 7000s have optional, extra cost, square grilles available.
- All grilles are paintable (instructions in manual).
- Invisa 525 and 650 have a rotating and tilting tweeter, make sure to orient it properly for the primary listening area (see manual).
- When you install the HTR 7000s as L/R Mains, we again suggest fairly far apart, and rotate the left and right speakers in the ceiling so that they are toed in and pointed at the center listening position.
- Invisa SPS have rotatable Reference HVFR tweeters, make sure to rotate if for center channel use. Also note backboxes are ONLY for reducing sound bleed to adjoining rooms, for best performance don’t use them unless you must.
I think that you will find the high frequencies quite different than anything else that you have heard. Really smooooooooth and extended. In terms of critical listening and the best fidelity, listeners should be seated. Of course, all the speakers will benefit from a good run-in period.
Have fun!